Showing posts with label diy. Show all posts

Thursday, November 8, 2012

{Pin it Friday} DIY Woodsy Transfer

When I saw this DIY I got really excited! For one I went to school for art and focused on mixed media and love to do transfers, secondly I love the FREE & fun woodsy letters they used!!

Wednesday, October 10, 2012

{Organic Wednesday} Salt Dough Favors

Salt dough recipe below


Salt Dough Recipe
Ingredients
1 cup salt
2 cups all purpose flour
1 cup luke warm water 

Directions
1. In a large bowl mix salt and flour.
2. Gradually stir in water. Mix well until it forms a doughy consistency.
3. With your hands form a ball with your dough and kneed it for at least 5 minutes. The longer you kneed your dough the smoother it will be.
Store your salt dough in a air tight container and you will be able to use it for days.
You can use cookie cutters to cut out shapes and stamps to imprint into the clay once they have been rolled out. Experiment with pressure to find the perfect amount you need. Paint your creations with acrylic paints and seal with varnish or polyurethane spray.
You can let your salt dough creations air dry, however salt dough can also be dried in the oven. Bake at 200 F until your creation is dry. The amount of time needed to bake your creations depends on size and thickness; thin flat ornaments may only take 45-60 minutes, thicker creations can take 2-3 hours or more. You can increase your oven temperature to 350 F, your dough will dry faster but it may also brown, which won't matter if you are painting your entire creation (you can also cover your dough in the oven before it turns brown).
There are a few options to color your salt dough1. Add powdered tempera paint to your flour, 2. add food coloring or paint to the water before you mix it with the salt/flour, or 3. add natural coloring like instant coffee, cocoa, or curry powder. source


These white clay tags are made out of white clay, not salt dough.

Tuesday, October 2, 2012

{DIY} Pom-Pom Pretty!

 How to Make the Pom-Poms

You'll need tissue paper and 24-gauge white cloth-covered floral wire.


Hanging Pom-Poms
1. Stack eight 20-by-30-inch sheets of tissue. Make 1 1/2-inchwide accordion folds, creasing with each fold.
2. Fold an 18-inch piece of floral wire in half, and slip over center of folded tissue; twist. With scissors, trim ends of tissue into rounded or pointy shapes.
3. Separate layers, pulling away from center one at a time.
4. Tie a length of mono-filament to floral wire for hanging.

Now if you are not the DIY type but still love these tissue paper pom poms for your bridal shower, baby shower, wedding, etc. you can hire me : ) or go the easy route and buy them from either of these Etsy shops:
Other fun pom pom ideas! 
Napkin Rings
With just a few changes, these follow the same steps as the hanging pom-poms.
1. Stack four sheets of tissue. Cut a 10-by-5-inch rectangle, going through all layers. Make 3/8-inch-wide accordion folds.
2. Fold an 18-inch piece of floral wire in half, slip over center of tissue, and twist to secure. Trim ends of tissue.
3. Separate layers, pulling away from center one at a time.
4. Bend wire into a loop to fit around napkin, and twist end around loop to secure.
Read more at Marthastewartweddings.com: Pom-Poms and Luminarias How-To

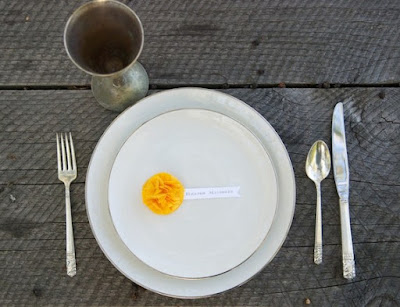
Let your guests know he/she belongs – and exactly where at the dinner table – with Potter and Butler’s take on the traditional place card, which we affectionately refer to around here as the I Belong Pom. 

The I Belong Pom measures 2” in diameter and is crafted using a soft cotton blend fabric with eco-friendly felt backing. The I Belong Pom includes graphic design and printing of you guests' names - printed on a thick card stock sash (printed in grey on white or ecru card stock). You can buy these adorable pom poms at Potter and Butler's Etsy Shop

Wednesday, November 23, 2011

Taken Photography Victoria & Branden Wedding


I recently went down to Miami, Florida to help out a Savannah photographer who you may remember had a {Vendor Spotlight} awhile back. Alicja of Taken Photography just posted the amazing pictures from this wedding that I helped be her light assistant. Yep, I can do that too. I actually went to college for graphic design & photography plus focused on ceramics, art history, and psychology. Although that was back when photography was all film so when everything went digital I stuck with what I do best - Party Planning and Designing. So whenever my photog friends need a hand with lighting, I'll jump right in since I LOVE it. She told me that I would love this wedding just from hearing some of the details, DIY, back yard, bird theme, purple, I WAS SO EXCITED!! To see more of this fabulous DIY wedding go to Alicja's website here: http://www.taken-photography.com/2011/victoria-branden-are-wed-modern-wedding-photographer


Friday, November 11, 2011

{Pin It Friday} Bell Send Off Wands

Today's pin I recently posted to Pinterest is a DIY for Bell Send Off Wands which are a great alternative to sparklers! According to The Green Bride Guide sparklers are fun (also can be very dangerous) but they are made from mined metals (such as iron, aliminum, barium, copper, and strontium) see more info below. I made ribbon wands in the Button Themed Shoot and they are really fun since you can match them to your wedding color scheme, but adding bells makes the experience so much MORE FUN!!


Environmental issues can include erosion, formation of sinkholes, loss of biodiversity, and contamination of soil, groundwater and surface water by chemicals from mining processes. In some cases, additional forest logging is done in the vicinity of mines to increase the available room for the storage of the created debris and soil.[26] Contamination resulting from leakage of chemicals can also affect the health of the local population if not properly controlled.[27] Extreme examples of pollution from mining activities include coal fires, which can last for years or even decades, producing massive amounts of environmental damage. Mining companies in most countries are required to follow stringent environmental and rehabilitation codes in order to minimize environmental impact and avoid impacts on human health. 
http://en.wikipedia.org/wiki/Mining

Tuesday, October 11, 2011

{DIY} How to Make a Button Boutonniere


You might know that I LOVE buttons and whenever I see anything button related I'm obsessed!! Check out my other button blog post here ***** get married has been shut down and now being reopened and redesigned so this post is no long there anymore.***** 

How to Make a Button Boutonniere By: Ariela Bonen, RBK Creations
We love being able to incorporate the groom into the overall button theme. Button boutonnieres are a great way to accessorize the groom – after all, it’s their big day too! Below you will find some of our secrets when it comes to creating a great, whimsical button boutonniere.
Items needed
  • Assortment of buttons in different sizes and colors to match your wedding
  • 18-22 gauge wire size 10”
  • Coordinating ribbon
  • Floral Tape
  • Scissors
  • Some type of leaf backing, we used an artificial leaf in this demo
  • Decorative sprigs
  • Corsage Pin
  • Wire Cutters and Needle Nose Pliers
  • Glue Gun and Glue Sticks
All photos by Ariela Bonen: RBK Creations

  • When choosing buttons it is best to get varying sizes you so can stack them nicely and see all of the buttons. A stack of 3 to 5 buttons tends to look the best.
  • Bend your wire in half, load your buttons up on the wire starting with smallest button first and ending with the largest button. You will thread the buttons on to the wire through the holes in your button.
  • Hold the buttons stack with one hand and then twist the wires together with the other hand, all the way to the end of the stem.
  • Once you have the stems twisted to the end, trim the ends to make them even and get rid of the sharp edges.
  • Bend the button stems down so they are facing towards you.
  • Start assembling the boutonniere by adding the stems together, one at a time. Wrap them with your floral tape to hold them together. Try to get it as tight as you can so it holds together.
  • Add your decorative sprig to the back and also attach with the floral tape.
  • Add the leaf and wrap one more time with floral tape.
  • Once your boutonniere is assembled, wrap your stem that is covered in floral tape with the ribbon of your choice. Use your hot glue gun to secure the ribbon on the top.
  • Add your corsage pin and your good to go!

Monday, August 29, 2011

{DIY} Savannah Rose Bouquet

I went down to River Street in Savannah to find someone to make me this Savannah Rose bouquet. It's not hard to find these craftsmen working with their hands to twist and turn the palm leaves into beautiful flowers. Just outside of Wet Willie's, I found a man who says he's there almost everyday, but Mondays, and he has made almost 50 little roses for one person before! These flowers are not covered in a protection spray which I do recommend to keep them from unraveling or if you would like to keep them for a long time. About 4 years ago I had a very small 3 flower Savannah rose bouquet made and it was sprayed with a clear glaze and I still have those flowers in perfect condition!

For this simple DIY I wanted to try and stay "green" and here is how I did it:
Recycled material: Hemp twine
Reused material: I looked around the house to find anything I could reuse and clean up to make pretty again....this is what I found: iridescent clear floral marbles (found at Micheal's and most craft stores), floating candles left over from Halloween, and a vase left over from a bridal shower
Re-purposed materials: glass jars (jam, pizza sauce, baby food jars, etc)
Use local: Savannah Rose artist

The Savannah rose bouquets can make beautiful bridal bouquets, nice centerpieces, or small accents. 
This set up is super simple, clean, and easy to put together and could be for your guest book sign in table, gift table, welcome table, centerpieces at the reception, or even for bridal showers. 

I have to thank Alicja from Taken Photography for helping me out on this DIY! She was so sweet to come over and take pictures for my blog post! We were covered in mosquitoes bites by the end of it, but it was so worth it! Thank YOU!


To finish off the palm leaf theme I suggest these two items from one of my favorite online favor stores: Favors and Flowers. The mini palm leaf favor bags can be filled with what ever you want and can be decorated to match your color scheme. Also if you are having your wedding here in the Savannah area during our hot months, fans are a necessity!! These bamboo fans can be bought in two sizes and you can add a ribbon with your wedding tag on it to dress it up.


If you want to try to make these Savannah rose bouquets here are some instructions:

  http://www.westtampahistory.com/palm_sunday/palm_weaving.htm

Tuesday, August 23, 2011

{DIY} Mason Jar Free Printables

here is a wonderful free mason jar DIY blog post by Cameron Blazer that I came across online. you all know I love mason jars so i had to share the love....go all the way down to the bottom of the post to click on the files to download. Enjoy!


a canning party - free printables from paper crave

Summer is a busy time Chez Industrialist, and so I am so happy to have asked the lovely Kristen Magee of Paper Crave to do a guest post. Like me, she shares a love of cooking, design, and craft. I think her post is the perfect blend of all three. I hope you love it as much as I do. Take it away, Kristen!
© 2010 Kristen Magee // Paper Crave
I have many wonderful memories of the yearly canning parties that my family used to have during the height of the summer harvest. Though I wasn't old enough at the time to actually take part in the jam making and pickling fun, I do remember having a great time picking berries from bushes that grew in the woods behind my godparents' house, which was where the parties were held. I honestly don't know how many of those berries actually made it back to the house, instead of going straight to my tummy!
© 2010 Kristen Magee // Paper CraveThough I now live in the city, with nary a wild berry bush in sight, as I've gotten older I've had a growing interest in “putting food by” - making my own jams, jellies, sauces, and anything else that strikes my fancy. I've only been canning for a couple of years, but it's been such a rewarding thing for me to do, and I'm happy to see that many more people have become interested in canning in recent years.© 2010 Kristen Magee // Paper CraveSo, why not take what can often be a solo activity and turn it into a party? Send out invites to friends and family, asking them to bring their garden bounty (or fruits and veggies from their CSA delivery or a local farm), and include several recipe cards so they can fill them out and share their favorite recipes for jams, pickles, sauces, and more. Be sure to have plenty of extra recipe cards on hand during the party for recipes created on the fly, and have plenty of labels and tags, too, so everyone can label what they made and share with the other guests. What better party favor than jars of tasty canned goods that can be enjoyed year 'round?
There are plenty of resources on the web to help you figure out what supplies you'll need if this is your first time canning. Lots of recipes, too! Here are some of my favorites:
Pick Your Own is a fantastic resource for learning how to can pretty much anything.
Fresh Preserving has step-by-step videos on canning different types of goods, and they have an online shop where you can purchase canning jars and more.
The National Center for Home Food Preservation is another great resource with plenty of safety tips and recipes.
Sunset has a great article that gives you a basic outline for throwing a canning party. Recipes included, too.
Canning Pantry is where I buy most of the supplies that I can't find locally. They have everything you'll need!
© 2010 Kristen Magee // Paper Crave
And here are canning party themed printable invitations with coordinating envelope liners - I sized the liners to fit 4 Bar envelopes from Paper Source. I've also made matching jar tags and labels, as well as recipe cards that you can include when you send the invites.
Free Printables: 

© 2010 Kristen Magee // Paper Crave

Monday, June 13, 2011

{DIY} Guest Book Idea

DIY Guest Book Idea I created in my backyard. Granted, I am not a professional photographer, but you get the gist of it. The flowers I arranged are craspedias (billy buttons), white freesia, and yellow daisies from Carlstedt's wholesale distributor in Savannah. The lace used is an heirloom from my great grandmother.


Instead of having a traditional guest book, have guests sign postcards from where your wedding is located. Put postcard stamps and address them prior to the wedding, then guests can write well wishes or advice during the reception. The cards are to be mailed the next day by a friend of the couple or your wedding planner, so that the newlyweds will return from their honeymoon to a brimming mailbox.

I used my dad's old cigar boxes for the postcards to be presented in. One box for the postcards that are ready to be written on and the other for guests to put when they are finished. My mom is an avid Scrabble player so I had some original Scrabble pieces handy to create the "WRITE US" rack. I'm thinking about doing a post next about a Scrabble theme wedding since it is definitely a popular trend right now!

Once you come home from your honeymoon, sort through all your wedding gifts, enjoy looking at your images from the wedding and honeymoon, and pick up your mail from the post office, you can begin this simple project of creating a binder ring book of all your postcards.

Simple Step-by-Step Instructions
1. Materials you'll need:
  • a variety of postcards from where your wedding will be (if it is a destination wedding you should be able to find a good selection at their visitor center).
  • whole puncher
  • binder ring (depending on how many guests attend your wedding you may have to buy a bigger size ring)
  • Archival, fade proof, non bleeding, waterproof marker ( I prefer the American Crafts Memory Marker with the two tips that can be purchased at most scrapbooking stores)
  • ribbon of your choice
  • scissors
2. Punch holes in the exact same corner of each postcard (I used the first one as my guide for all the others and chose the bottom right since it wouldn't interfere with the postcard image description or the guests notes)

3. Open up the binder clip, put all the post cards on, then close the clip

4. Cut short pieces of your ribbon and double knot them around the binder clip. (I like to alternate with two different ribbons to make it a little more interesting)
 
Viola! You now have a simple book filled with all the love of your friends and family, that will remind you of your wonderful wedding day!

(As a side note and for fun - just as I was finishing up, my cat Ty decided he wanted to be a model, more like beat the heat and find some shade under my table. I don't know why he likes to go out in the Georgia summer heat!)
*inspired by MarthaStewartWeddings.com http://bit.ly/lh3rtA

Sunday, June 12, 2011

TapeSwell

http://www.tapeswell.com
What is TapeSwell you ask?? It is a company that makes stylish sticky products on a roll.  You’ll find decorative tape products that add a notable look to all your wedding guest favors, envelopes, or other stick-able surfaces.
"TapeSwell makes the practical pretty and the old new again. Used together or separately, the labels, tapes and wraparounds let you put a personal touch on any box, package or envelope. Think of it as industrial chic and let your imagination run wild. "
Check out this video for some more ideas:
http://www.youtube.com/watch?v=piZmYwh244A&feature=player_embedded#at=13


Thursday, June 10, 2010

{Real Wedding} My Intimate Wedding

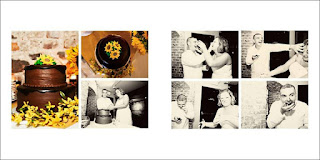
With a deployment date set for fall 2009, Chris and I quickly planned our intimate local wedding before he left for Iraq. Our ceremony was at a historic square and the reception was held where we had our first date. When we found out that his deployment date was moved up we realized that we should probably plan our wedding sooner than planned. We did not want to wait a year to plan our wedding especially with Chris being in Iraq, nor did we have a big budget, so instead of doing a court house ceremony we planned an intimate gathering of friends and family. My first choice was to have our wedding at Tybee Island, but The Last Song was being filmed on the beach and logistically it would have been a nightmare. Instead, we decided to move our wedding to downtown. We also found out that the Moon River Brewing Company, where we had our first date, had a cellar downstairs available for small events that was just right for our size wedding and small budget. Thankfully no ghosts joined us for our wedding since a ghost named Toby haunts the billiard room and other spirits lurk according to Zak, Nick and Aaron from Ghost Adventures. Some of our family and friends were able to come to our wedding and one of my dearest friends was our photographer. It was a perfect intimate wedding that was surprisingly planned in less than a month!

Date: Saturday, July 2, 2009
Ceremony: Warren Square
Reception: Moon River Brewing Company's cellar
Reverend: Joe Wadas
Photos: Nicki Bursae Photography
Acoustic Guitar: pachelbel's canon in d by Will Cady, bride's brother
Hair: Chellie Heckman at Rob's at Drayton Tower
Makeup: bride's friend
Cake: Bakers Pride
Dress: White House | Black Market
Veil: The Gingerbread House Bridal
Wedding rings: Anderson Jewelers, Engagement ring heirloom
Alterations by Vera
Something Blue: garter handmade by groom's mother
DJ: iPod
Wedding planner, Invitations, Programs, Flowers & Guest Favors created by Layla

Eco-friendly detailsflowers bought directly from wholesaler, handmade invitations and programs, engagement ring is a family heirloom, supported local businesses, and "green" wedding photographer.


Blog Design by Get Polished | Copyright © Mason Jar Arts